Synology DS224+ Featured Image
Check Synology DS224+ Prices

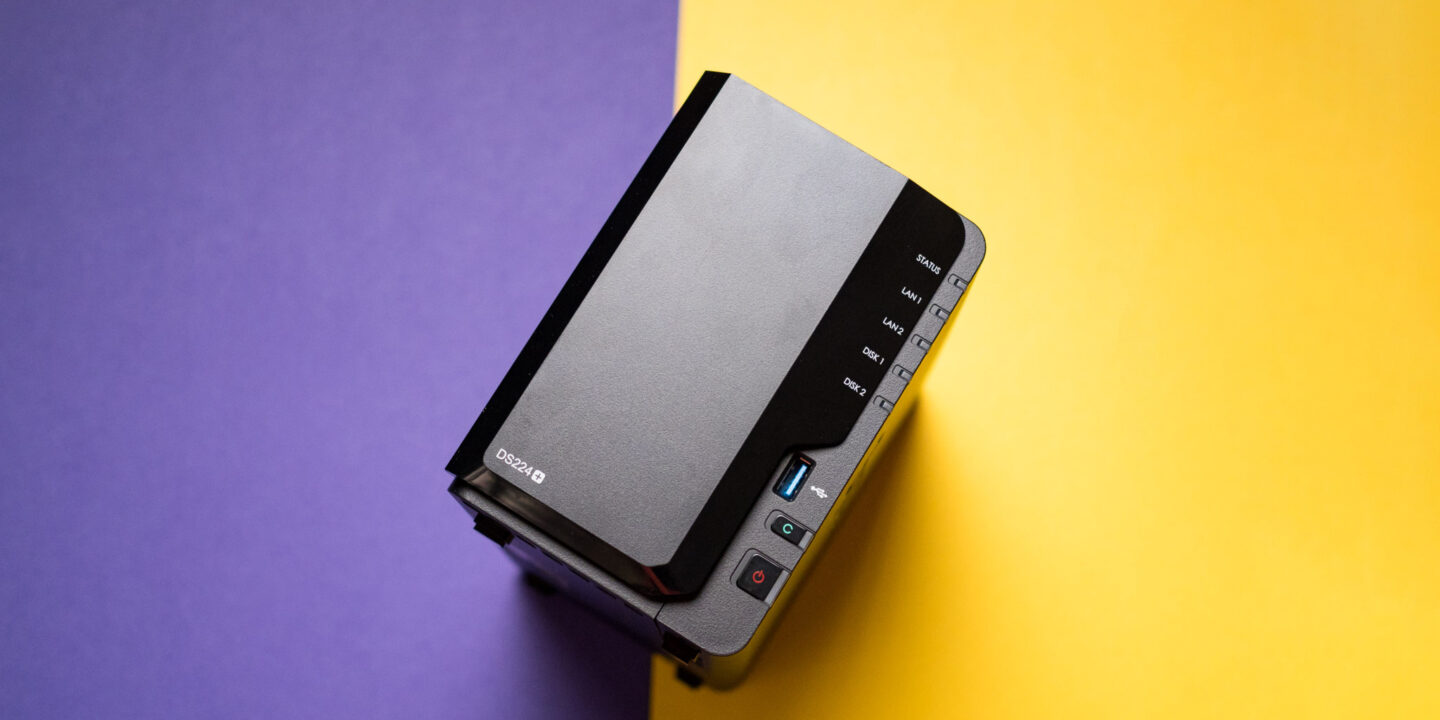
Synology DS224+ Introduction

The Synology DS224+ is a fantastic 2 bay NAS device that is geared towards home users and small businesses. It is an extremely capable NAS for its size and price range and is an ideal entry device into the world of NAS. If you are unsure of what a NAS is, check out our What is a NAS? An in-depth guide.

Synology is considered one of the best manufacturers of NAS devices due to its build quality and argueable most importantly its web interface which has plenty of options and in-built apps for you to use to simplify setup and management. 

With Synology also being such a popular choice for home labs you are almost guaranteed to find a guide for whatever use case you are intending for it. Whether it is setting up a plex server to act as a storage hub for your owned media, creating yourself a personal google photos alternative (via Immich for example) or setting up reverse proxies to access apps and services you host on your NAS from anywhere in the world. 

Please note, that NAS devices rarely (if ever) come with any storage as standard. It is up to you to find and purchase whatever storage you would like to use with your NAS. Synology provides a list of compatible storage for the DS224+ which you can find here.

They are heavily pushing their own brand Synology Storage media, but the DS224+ (and the rest of the synology range) is compatible with a wide range of different HDD’s.

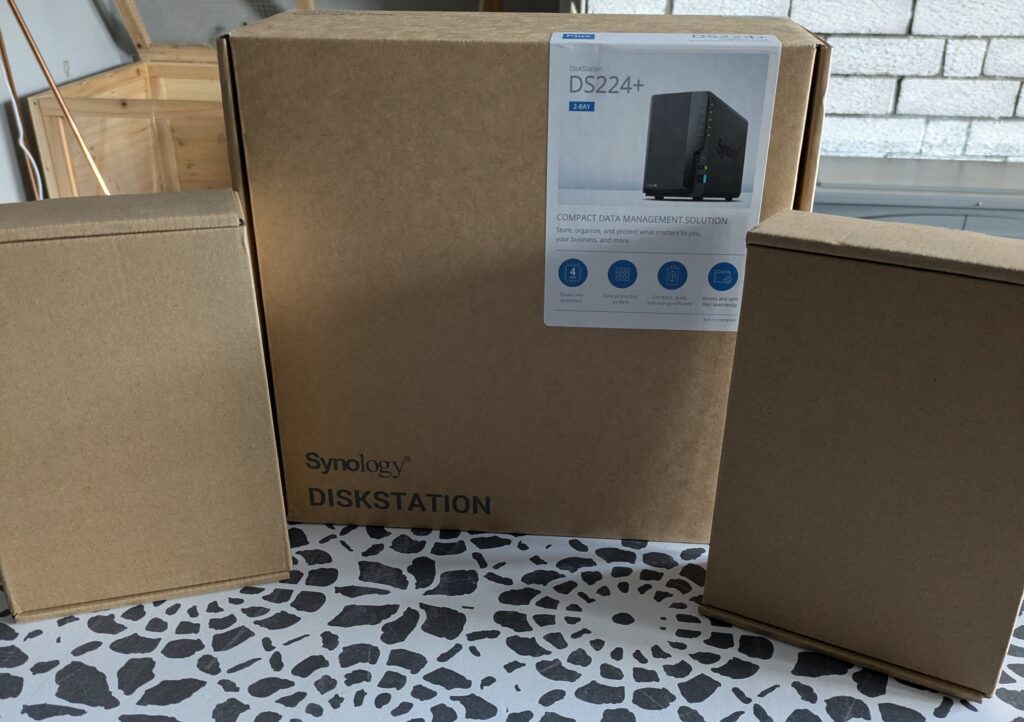
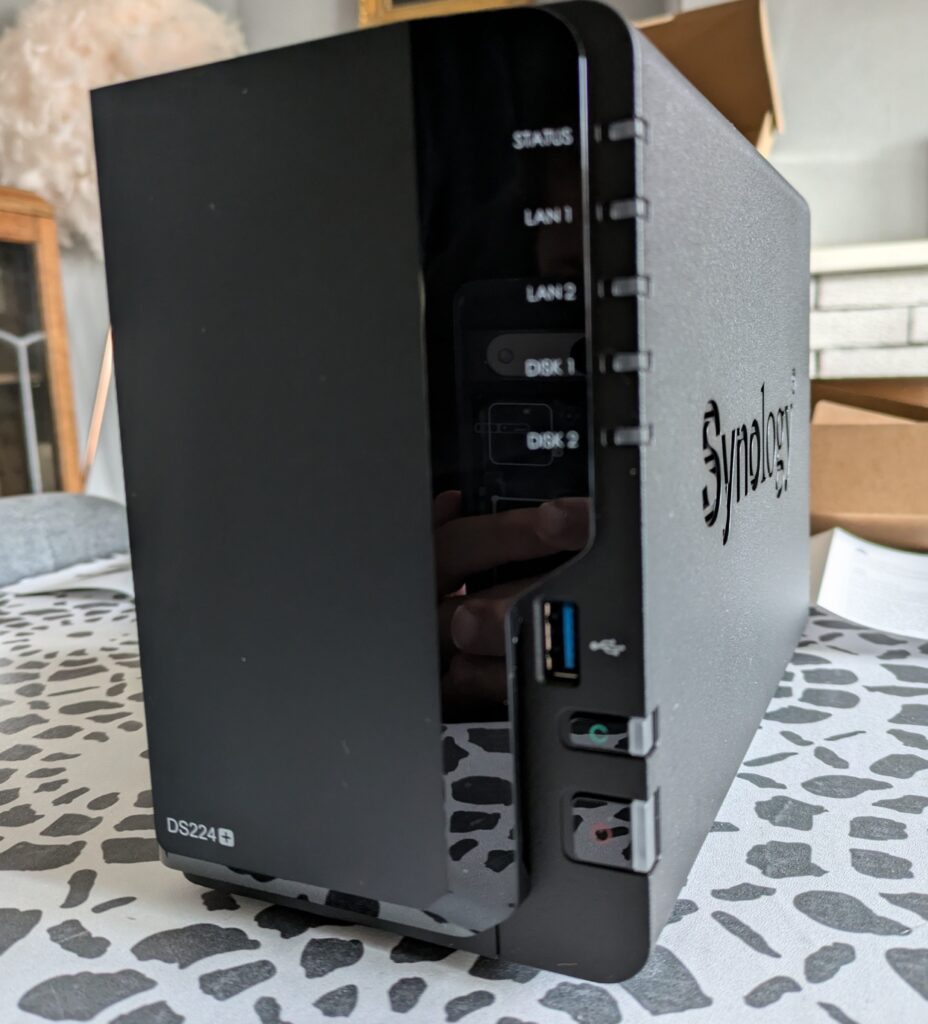
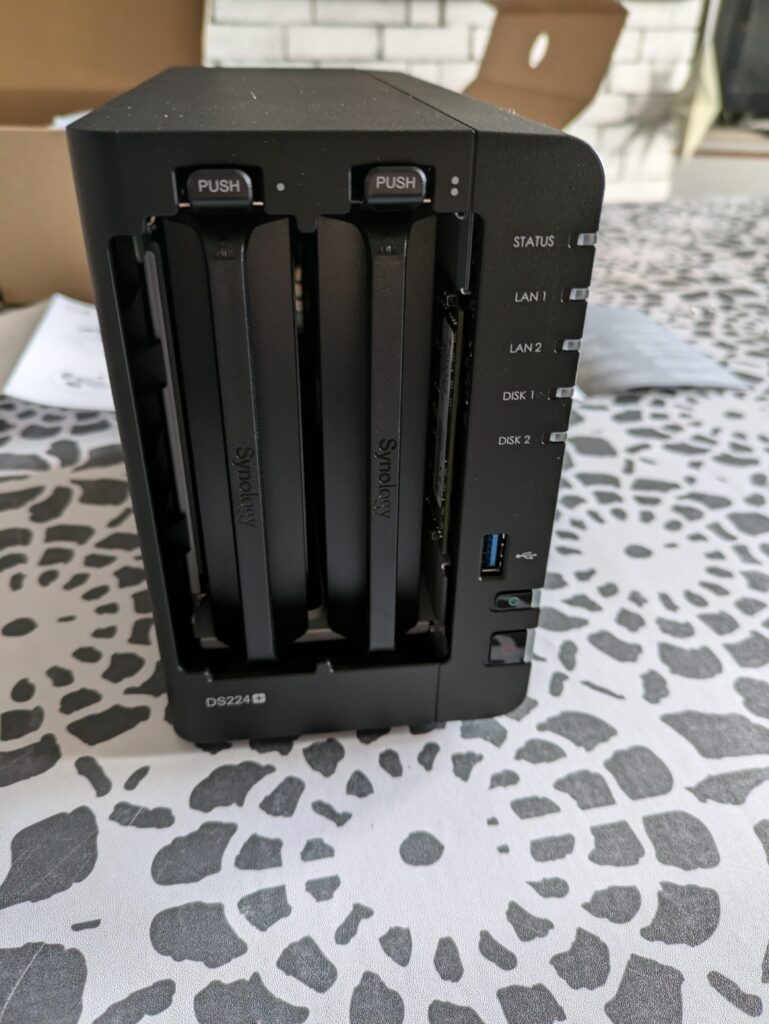
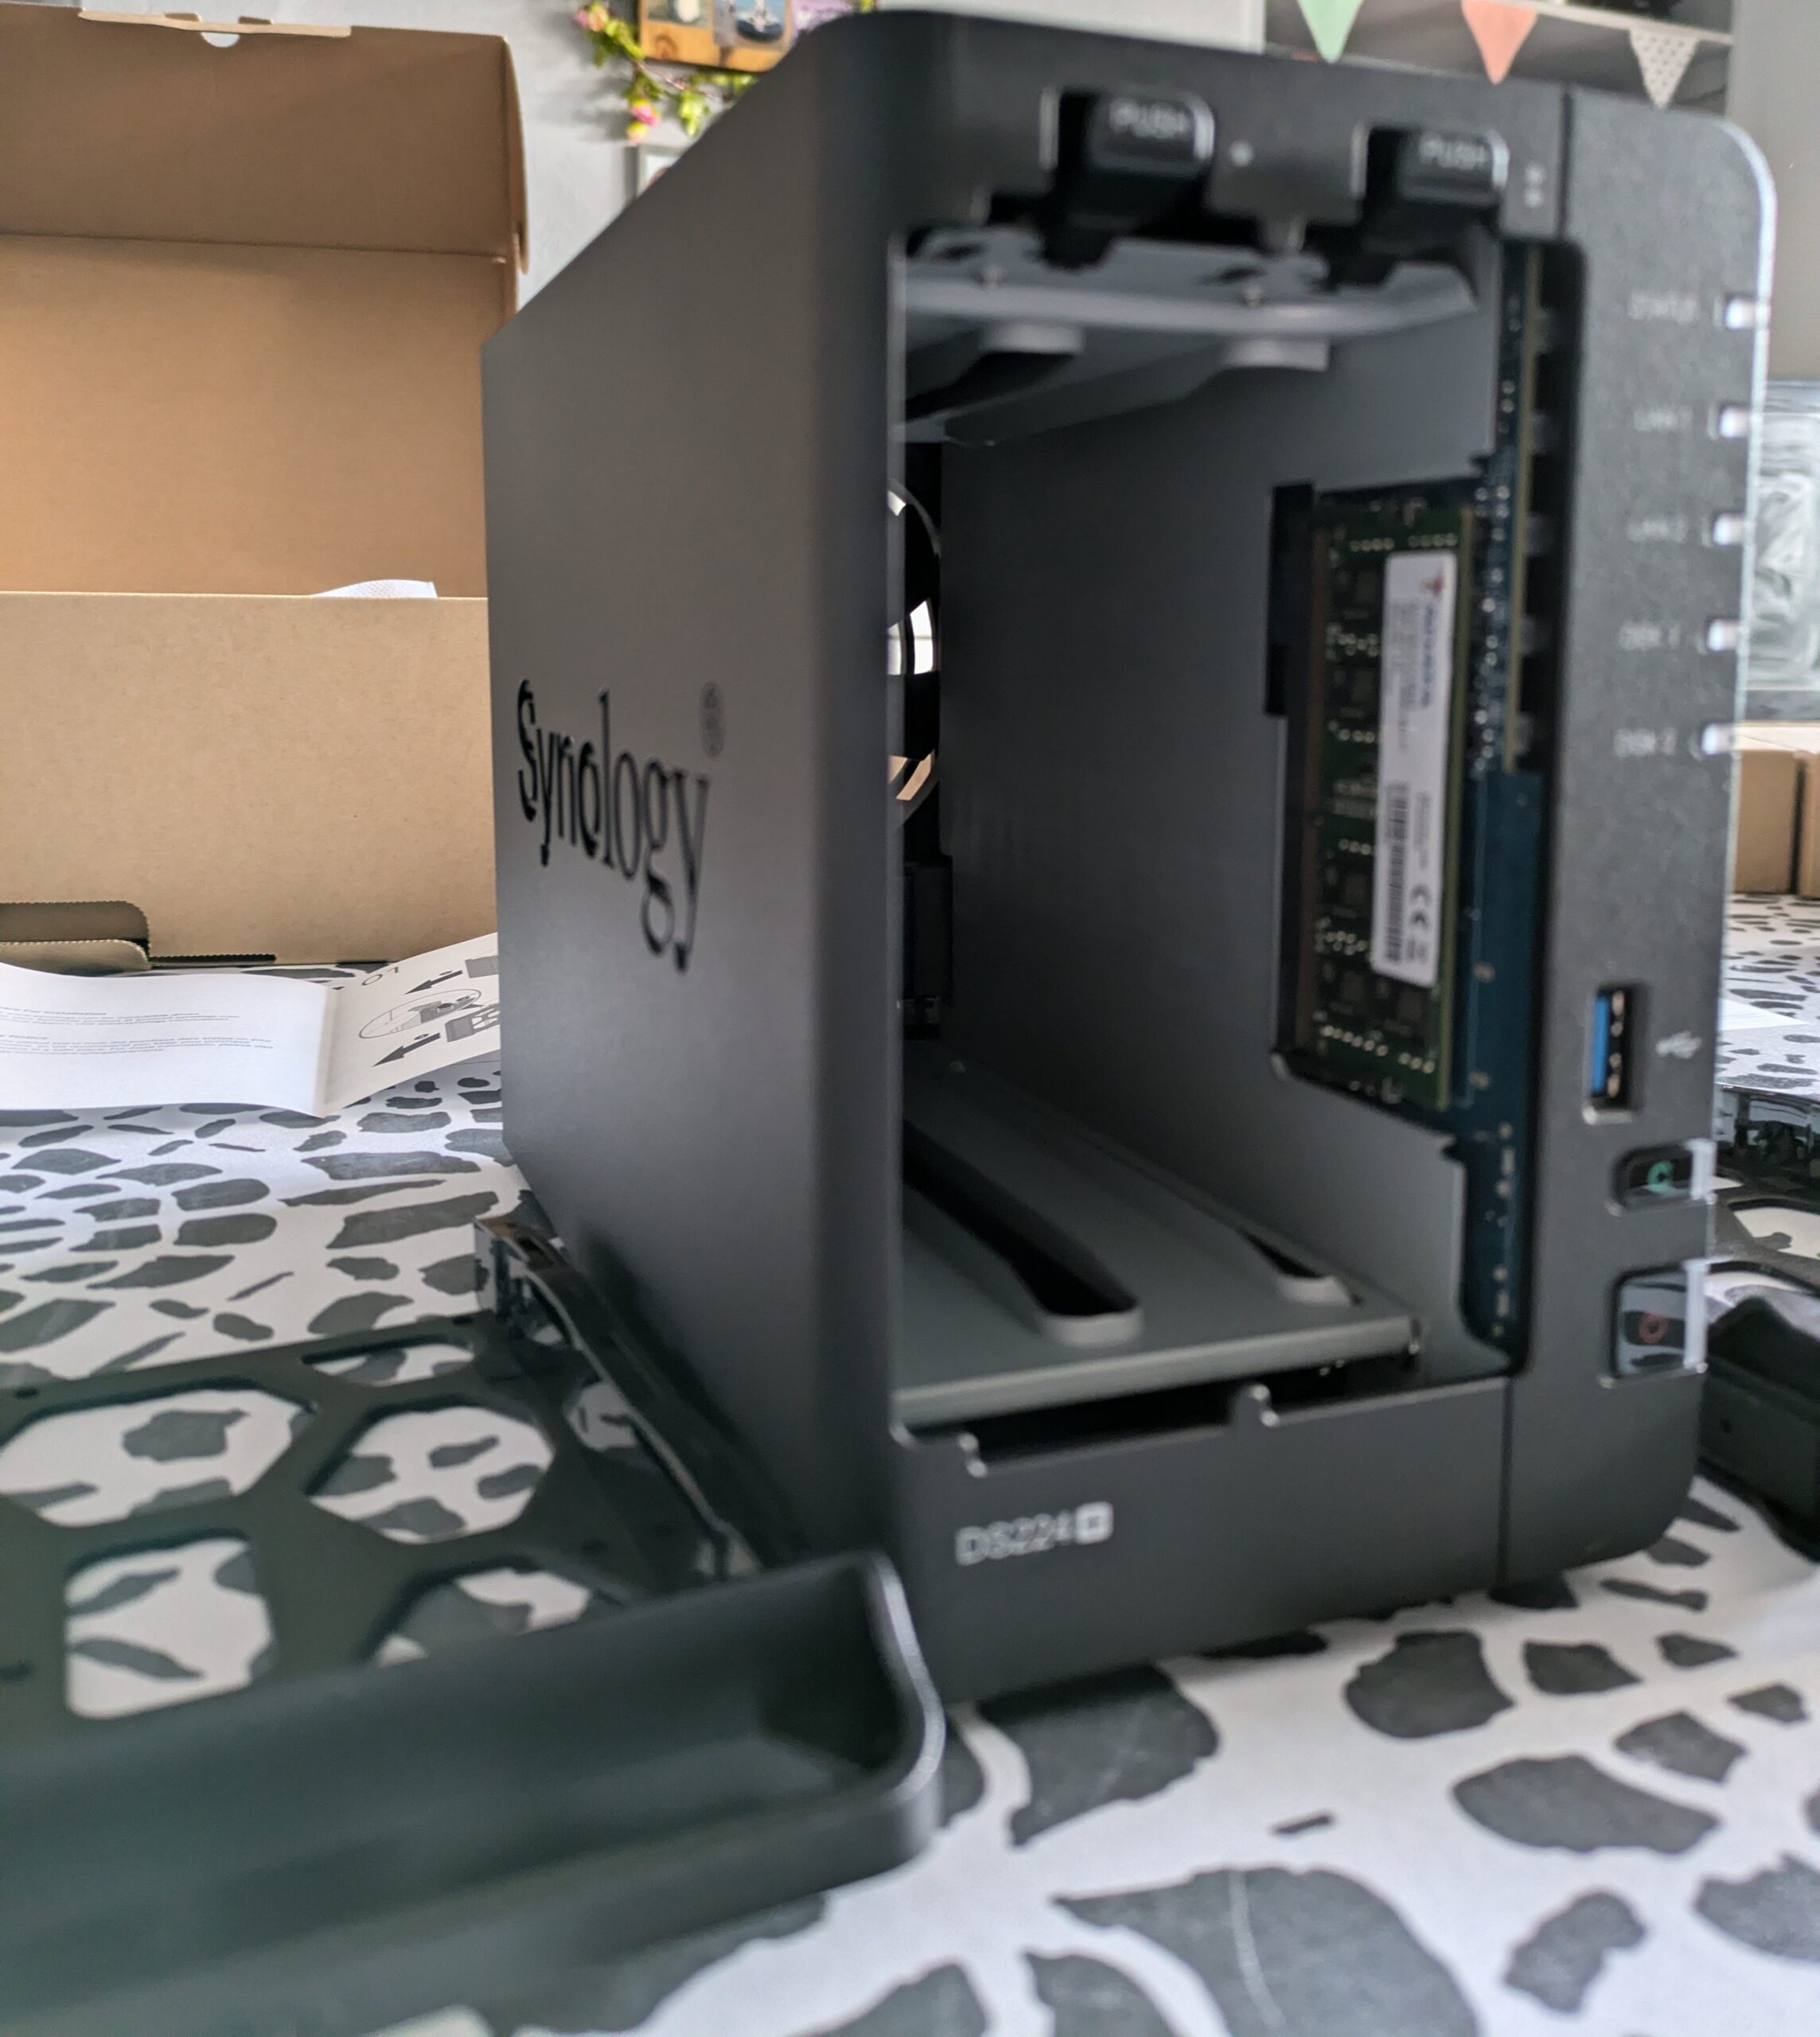
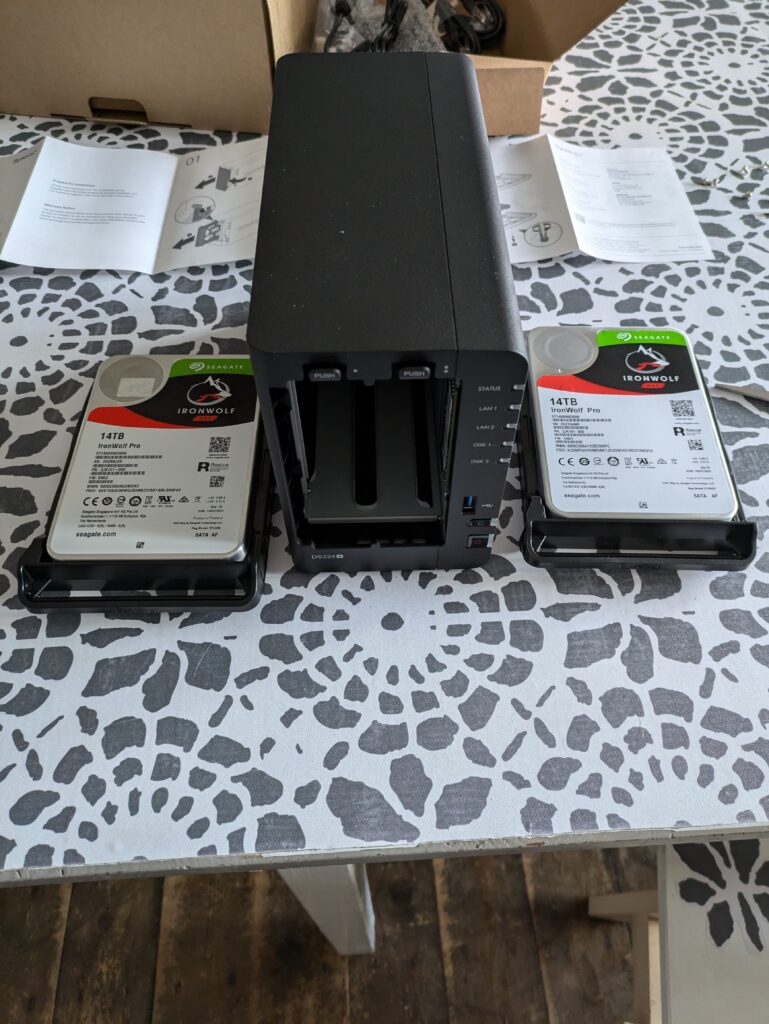
Synology DS224+ Unboxing

I purchased my DS224+ along with 2x14TB Seagate HDD’s. This has served me extremely well since it arrived and performance has been solid and consistent with little to no issues in the time I have owned the device. I use mine for a multitude of functions and it has never missed a beat.

Synology and Drives (Boxed)

The device itself comes in a small, unassuming box and as I purchased it together with my 2x14TB Seagate drives I also received the drives at the same time. This allowed me to unbox and setup the NAS as soon as it arrived.

Specifically I use the SeaGate IronWolf Pro, 14TB Network Attached Storage HDD’s

Within the Synology box, you will find the device itself, a user manual, a network cable and a power cable.

Taking the device out of the box, you will see the DS224+ with its front cover attached. The front cover is there to both protect the pull out storage tray and also give you indications of what each of the LED lights refer to when it is in use and functioning:

Synology - Front (With Cover)

If you remove the front cover, it will reveal a pull-out tray, which is where you put your HDD’s to use as your storage devices. This particular NAS is a 2 bay NAS meaning it has space for 2 HDD’s. You can purchase 4, 6 and even 8 bay NAS boxes if your needs require that. 

Synology - Front (No Cover)
Synology - Front (Rack Removed)

With the racks removed, we can now grab our HDD’s and prepare them to be mounted to the 2 pull out trays. This makes it very easy to add your HDD’s to your NAS as you simply mount them to the trays, and then re-insert the trays into the NAS. You should feel/hear a click and the drives are then fully attached to the NAS.

Synology and Drives (Unboxed)

After mounting the drives to the trays, simply slide the trays back into the NAS box and we are almost ready to boot the Synology DS224+ up for the first time. 

The user manual is a great way of understanding how to first setup and activate your NAS which guides you through creating a profile and setting up your security (it will ask you to setup 2FA which I highly recommend doing so to thoroughly protect your NAS).When first turning the NAS on, it may take a little while to boot whilst it runs though its initial setup/configuration. However once the NAS is setup you will rarely, if ever have to turn it off/reboot it unless you chose to do so.

Synology - Setup (Working)

If done correctly and you have both HDD slots filled, you should see similar to the above.

Status: This should remain a solid green once it has booted fully and is setup.

LAN 1 / LAN 2: I use a single ethernet cable from my router to my NAS, utilizing slot 1 so I only have LAN 1 a solid green.

Disk 1 / Disk 2: As I am utilizing both HDD trays, I see both Disk 1 and Disk 2 solid green.

It is extremely simple to setup your Synology NAS and get it up and running, which is where the real fun begins. We can now begin populating our NAS with apps/services to increase its functionality and (in my case) replace some subscriptions that I will no longer need. (For example I cancelled my dropbox subscription and Google Photos subscriptions as I self host alternatives for these on my NAS box).

Whilst purchasing a NAS and its drives can be a substantial upfront cost, if you do are planning on replacing paid services such as I did, the cost benefit can quickly pay off and the NAS will save you a lot of money in the long run. Roughly 19 months after my initial purchase I had saved enough money from not paying subscriptions to fully pay off the initial investment. 

Check Synology DS224+ Prices

Synology DS224+ Review

Is the Synology DS224+ a worthy NAS box and is it worth the initial cost as opposed to continuing with paid subscriptions for services?
9.5

The Synology DS224+ is a fantastic NAS and probably my favorite NAS I've ever owned. It is an extremely popular NAS device and for good reason. It offers a great balance of price vs performance and supports a huge range of apps and services (including its 'Container Manager', which allows you to utilize popular open sourced apps via Docker). With it being such a popular device (and Synology probably being the most popular NAS provider), it is very easy to find in-depth guides for setting up any of the apps/services you chose to use.

Pros
  • Great price vs performance
  • Supports many different HDD brands
  • A very polished and easy to use web interface for interacting with your NAS
  • Very reliable NAS with little to no performance or stablity issues
  • Extremely capable as a media server with CPU transcoding support
  • Upgrading the RAM is possible (but can be difficult to find supported RAM modules)
Cons
  • No M.2 slots
  • Only supports up to Gigabit Ethernet
  • Cannot upgrade the Gigabit Ethernet to 2.5GBe
  • Can be too pricy upfront to some (although this is just NAS devices in general)

Leave a Reply

Your email address will not be published. Required fields are marked *